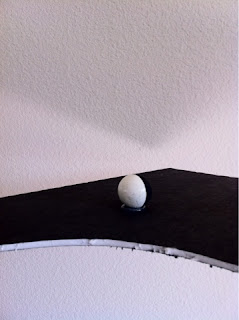
Essentially, this Moon Phase board allows students to visualize and better understand the cause of moon phases and comprehend the 2 different views that are often given on a diagram (view from space and view from the Earth).
Up to this point, I've done a Lunar Lollipop Investigation, which I thought was great, but this beats it by a long shot! A large majority of my students don't really understand why the lit part of the moon doesn't face the sun on part of the view as seen from Earth on every moon phase diagram (see below).
Even though I give many different examples and explanations, I still see a puzzled look on several of the students' faces. I really think this method will clear it up for even those puzzled kiddos.
From this angle (see below), students can quickly see that the lit part of the moon is always the side of the ball that is facing the sun.
Pretty uneventful, but definitely clarifies this view. But as students take the Moon Board and place their head through the hole, they are immediately taken to the view from Earth (their head being Earth or it could be explained that we LOOK out from Earth and see the moon as it revolves around the Earth).
In order to give you a clearer idea of what the students will see, I placed my camera in the hole and continually rotated the board around counterclockwise (direction of the moon's revolution around the Earth). Here, you can see the new moon.
Followed by the waxing crescent.
The first quarter.
Then waxing gibbous.
Full moon
Waning gibbous
Third/Last quarter (oopsy....this ball got a little tilted when I glued it down)
And finally, waning crescent.
To make your own, you will need the following supplies:
- Black foam board (got mine at Dollar Tree for $1)
- Box cutter
- Circular shaped object to cut around (I just turned my office trashcan upside down and started cutting!)
- 8 ball shaped objects to represent moon (ideas: ping pong balls [use black sharpie], Styrofoam balls (paint with black acrylic paint and sponge brush, wooden balls, etc....)
- Hot glue gun
- 1 ball to represent the Sun (larger than moon ball) This is optional; you could always just write "Sun" on one side of the board with a paint pen, but I think the added visual is great!
Since I didn't have these made when I taught moon phases earlier in the year, I am going to use them when we begin to review for the state assessment. I can't wait to hear the oohs and aahs and FINALLY see the looks of confusion go away.
For more great lessons, labs, and activities that related to moon phases, check out these products in my Teachers Pay Teachers store:
- Space Science for Interactive Notebooks
- Moon Phases and Seasons Task Cards
- Daily Science Starters for Middle School - Earth and Space
- Predicting the Sequence of Events in the Lunar Cycle Activity
- That's a Fact, Jack! Fact or Fiction Science Sorting: Motions of Earth and Moon
- Day/Night, Seasons, Moon Phases, & Tides Review Circuit
- Predicting Moon Phases Color-by-Number
- 8th Grade Science STAAR Review- Reporting Category 3 (Earth & Space)
- Moon Phases Reciprocal Learning Activity


I made two of these for my students to use this year and it worked really well. Not only did I use it with introducing moon phases, I was able to break it out for eclipses and tides to help them get a better picture of how the moon interacts with Earth. I had my neighbor coming over and borrowing the boards to help her students understand better. Her students loved the boards too. I was a bit rushed when I made mine this year. I plan on making some over the summer that I can really spend some time perfecting placements and painting. Thanks so much for posting this idea!
ReplyDeleteSherrie
Wow this is awesome! I just made one, and it took practically no time at all and only cost $4.84! I cannot wait to show my kiddies tomorrow!! Thank you so much for this idea!
ReplyDeleteI'm making this as we speak! Is there a worksheet that you use with it? Just curious how you get it to stick or how you structure the students using it....
ReplyDeleteAwesome idea. I'll be making it for those who still haven't got the concepts. Thanks for sharing
ReplyDeleteThis helps ME better understand this! Thank you!
ReplyDeleteWhat is the dimension of the hole in the middle? And how far apart did you spread out your moons?
ReplyDeleteKa-
ReplyDeleteThanks for visiting my blog. The large hole is about a foot wide. The moons are placed around the hole at what would be your typical "clock positions" - 12:00, 3:00, 6:00, 9:00, and the other 4 are spaced evenly between those main 4 positions. Hope this helps!
Thank you so much for sharing this! I made one for my Navigator scouts troop and they loved it. The parents were impressed, too!
ReplyDeleteThank you for sharing this. I am doing a workshop on Saturday and this will be a huge help. STJ, have you had a chance to check out my wearable lunar cycle shirts yet? :-)
ReplyDeleteJody- Yes, I've seen your shirts. Thanks!
DeleteThank you so much for posting these great ideas!
ReplyDeleteJust sharing - A teacher shared with me that to make storage easy, she uses velcro to affix the ping pong balls on so they can easily be removed and stored in a ziplock and the boards can be stored flat. As part of the "lab", students place the balls on themselves. She had one board and a set of moons per lab table (or in her case 8 sets).
ReplyDeleteJody- What a great idea! I have had problems with the kids knocking the styrofoam balls off, so this would be a quick fix. Thank you for sharing.
Delete